Chocolate Mint Slice Bars
Highlighted under: Cakes & Confections
I absolutely love these Chocolate Mint Slice Bars! The combination of rich chocolate and refreshing mint is a match made in dessert heaven. Whenever I make these bars, my friends and family can't get enough of them. They're surprisingly easy to whip up, and the result is both beautiful and delicious. With just a handful of ingredients, you can create an indulgent treat that impresses every time. I especially enjoy making these for gatherings because they always disappear quickly!
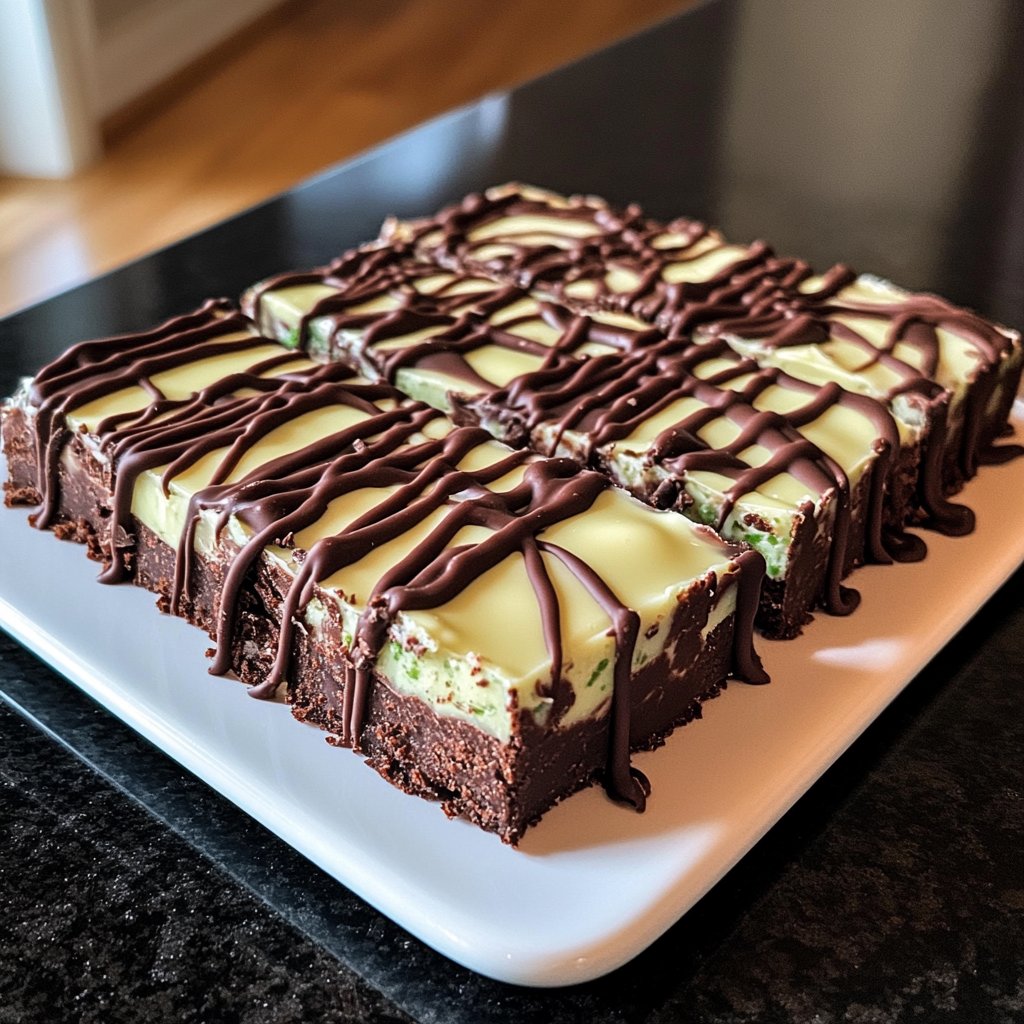
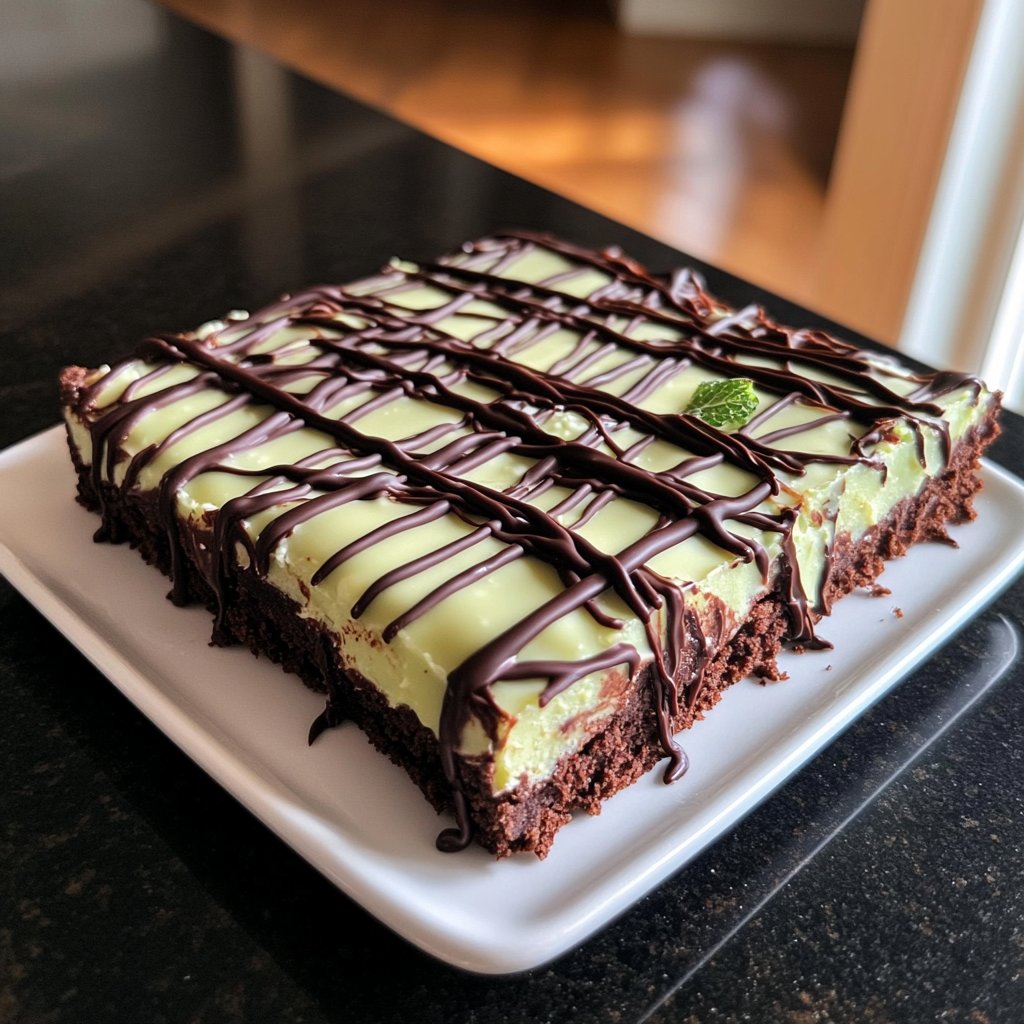
When I first made Chocolate Mint Slice Bars, I was amazed by how simple the process was. I started by melting the chocolate and mixing it with crushed biscuits, which created a beautiful base layer. Then, I made a mint filling that perfectly complemented the chocolate; the freshness of the mint really elevates the dish. It’s a delightful balance between the rich chocolate and the cool mint.
As I layered the bars, I realized how versatile this recipe is. You can easily adjust the level of mint to your liking or even add a sprinkle of sea salt on top for a sophisticated touch. Every time I serve these, they receive rave reviews, and they always remind me of joyful gatherings and celebrations.
Why You'll Love These Bars
- Decadent chocolate with a refreshing mint twist
- Perfectly chewy texture that melts in your mouth
- Great for parties or a personal sweet treat
Understanding the Ingredients
The quality of your chocolate is crucial when making these Chocolate Mint Slice Bars. For the base, using digestive biscuits adds a subtle sweetness and a crumbly texture that complements the rich chocolate. Opt for good quality dark chocolate for melting, as it not only enhances the flavor but also creates a velvety consistency in the base. When selecting peppermint extract, choose an oil-based extract for a more robust flavor, as it will provide a refreshing contrast to the chocolate without being overly sweet.
The icing sugar plays a vital role in the mint filling, giving it a smooth and rich texture. If you find the filling too thick, don't hesitate to adjust the milk; this ensures that your filling can be spread easily without tearing the biscuit base. Always add milk gradually, as too much could lead to a runny filling, which can affect the bar’s structure.
Perfecting the Layering Technique
Layering is key to achieving the ideal texture in these bars. When pressing the biscuit mixture into the baking dish, use the back of a measuring cup or your hands to compact the crust firmly. This prevents the base from crumbling when you cut the bars later. Aim for an even thickness across the bottom, about half an inch thick, to ensure stability when layered with the mint filling and chocolate topping.
Spread the mint filling all the way to the edges of the base for a consistent flavor in every bite. When pouring the melted milk chocolate on top, allow it to cool slightly before spreading it; this helps maintain the distinct layers and prevents the filling from melting into the chocolate. Use an offset spatula for a smooth finish, and don’t forget to refrigerate the bars long enough—around an hour should suffice for them to set completely.
Ingredients
For the Base
- 200g digestive biscuits, crushed
- 100g unsalted butter, melted
- 50g dark chocolate, melted
For the Mint Filling
- 300g icing sugar
- 1/4 cup peppermint extract
- 2 tablespoons milk, as needed
For the Topping
- 200g milk chocolate, melted
- A few chocolate shavings (optional)
Instructions
Prepare the Base
In a mixing bowl, combine the crushed digestive biscuits with melted butter and melted dark chocolate. Mix until well combined. Press this mixture firmly into the bottom of a lined 8x8 inch baking dish to form an even base.
Make the Mint Filling
In another bowl, mix the icing sugar with the peppermint extract. If the mixture is too stiff, add milk a tablespoon at a time until smooth and spreadable. Spread this mint filling evenly on top of the biscuit base.
Add the Chocolate Topping
Pour the melted milk chocolate over the mint layer, smoothing it out evenly. If desired, sprinkle chocolate shavings on top for decoration. Refrigerate for at least 1 hour to set.
Cut and Serve
Once set, remove the bars from the baking dish using the edges of the lined paper. Cut into squares or rectangles. Enjoy your delicious Chocolate Mint Slice Bars!
Pro Tips
- For an extra kick, try adding a few drops of green food coloring to the mint filling to make your bars festive for holidays!
Storage and Make-Ahead Tips
These bars can be made a day in advance, making them a great option for gatherings. Once they are set, store them in an airtight container in the refrigerator to keep them fresh. They can also be frozen for up to three months; simply wrap each piece individually in plastic wrap before placing them in a freezer-safe container. To serve, allow them to thaw in the fridge overnight for the best texture.
If you want to make them more festive, consider adapting the recipe for seasonal holidays by adding colored sprinkles or use flavored extracts like orange or almond to switch up the mint. This variation not only changes the flavor profile but also makes them visually appealing for events.
Common Troubleshooting Tips
A common issue when making the base is that it may become too oily. If this happens, consider adding a bit more crushed biscuits to absorb excess moisture. Moreover, if the biscuit crust is too crumbly once set, this can often be fixed by pressing the mixture more firmly into the base when assembling, ensuring it adheres well during chilling.
When working with the mint filling, ensure it’s smooth before spreading. If you experience clumps of icing sugar, using a sieve to sift the icing sugar before mixing can help avoid this problem. Similarly, if your chocolate topping is too thick, gently reheating it over a double boiler will make it easier to spread.
Questions About Recipes
→ Can I use different types of chocolate?
Yes, you can use white chocolate or dark chocolate for different flavor profiles.
→ How should I store these bars?
Store them in an airtight container in the refrigerator for up to one week.
→ Can I freeze Chocolate Mint Slice Bars?
Absolutely! Wrap them tightly and freeze for up to three months. Thaw in the fridge before serving.
→ Is there a substitute for peppermint extract?
Yes, you can use vanilla extract for a different flavor, but it won't have that classic mint taste.
Chocolate Mint Slice Bars
Created by: Freya Cooper
Recipe Type: Cakes & Confections
Skill Level: Beginner
Final Quantity: 12 bars
What You'll Need
For the Base
- 200g digestive biscuits, crushed
- 100g unsalted butter, melted
- 50g dark chocolate, melted
For the Mint Filling
- 300g icing sugar
- 1/4 cup peppermint extract
- 2 tablespoons milk, as needed
For the Topping
- 200g milk chocolate, melted
- A few chocolate shavings (optional)
How-To Steps
In a mixing bowl, combine the crushed digestive biscuits with melted butter and melted dark chocolate. Mix until well combined. Press this mixture firmly into the bottom of a lined 8x8 inch baking dish to form an even base.
In another bowl, mix the icing sugar with the peppermint extract. If the mixture is too stiff, add milk a tablespoon at a time until smooth and spreadable. Spread this mint filling evenly on top of the biscuit base.
Pour the melted milk chocolate over the mint layer, smoothing it out evenly. If desired, sprinkle chocolate shavings on top for decoration. Refrigerate for at least 1 hour to set.
Once set, remove the bars from the baking dish using the edges of the lined paper. Cut into squares or rectangles. Enjoy your delicious Chocolate Mint Slice Bars!
Extra Tips
- For an extra kick, try adding a few drops of green food coloring to the mint filling to make your bars festive for holidays!
Nutritional Breakdown (Per Serving)
- Calories: 250 kcal
- Total Fat: 12g
- Saturated Fat: 7g
- Cholesterol: 30mg
- Sodium: 50mg
- Total Carbohydrates: 30g
- Dietary Fiber: 1g
- Sugars: 20g
- Protein: 3g