Garlic Herb Breadsticks
Highlighted under: Cakes & Confections
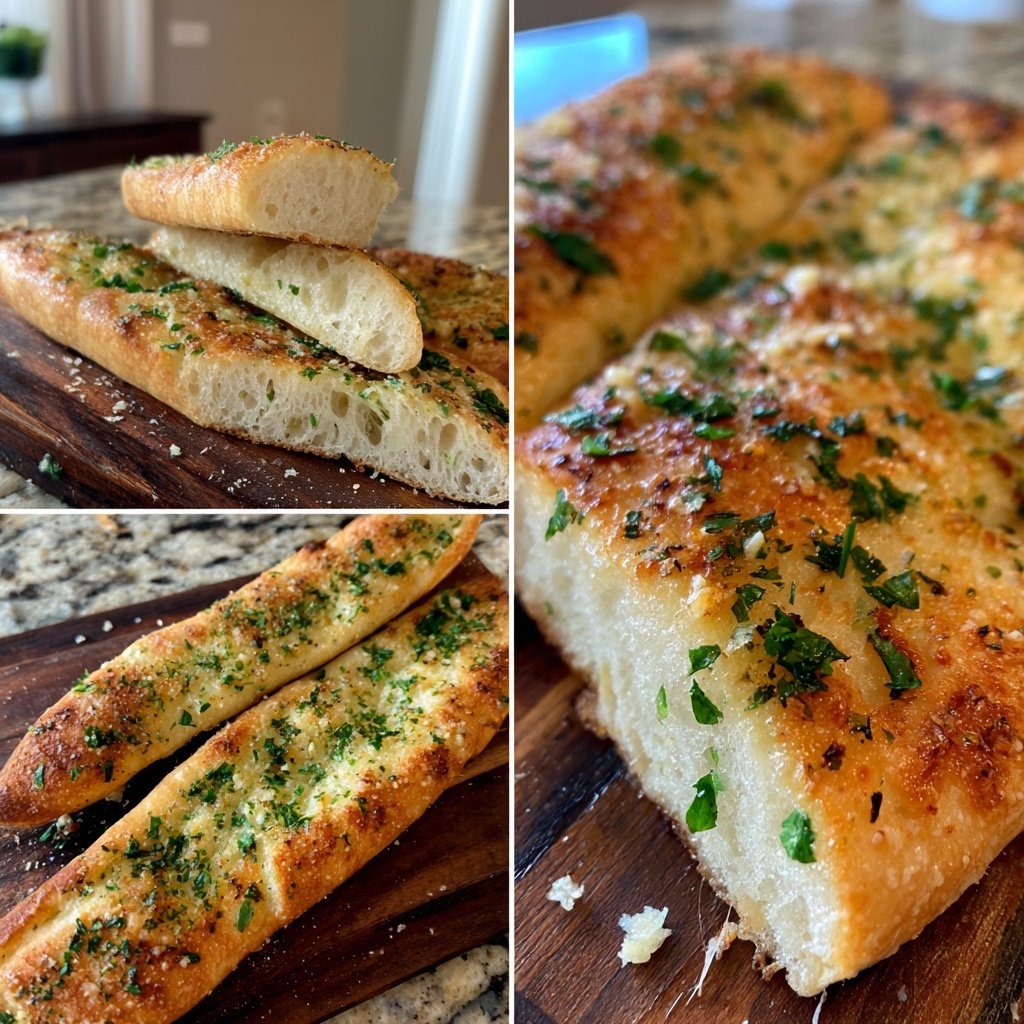
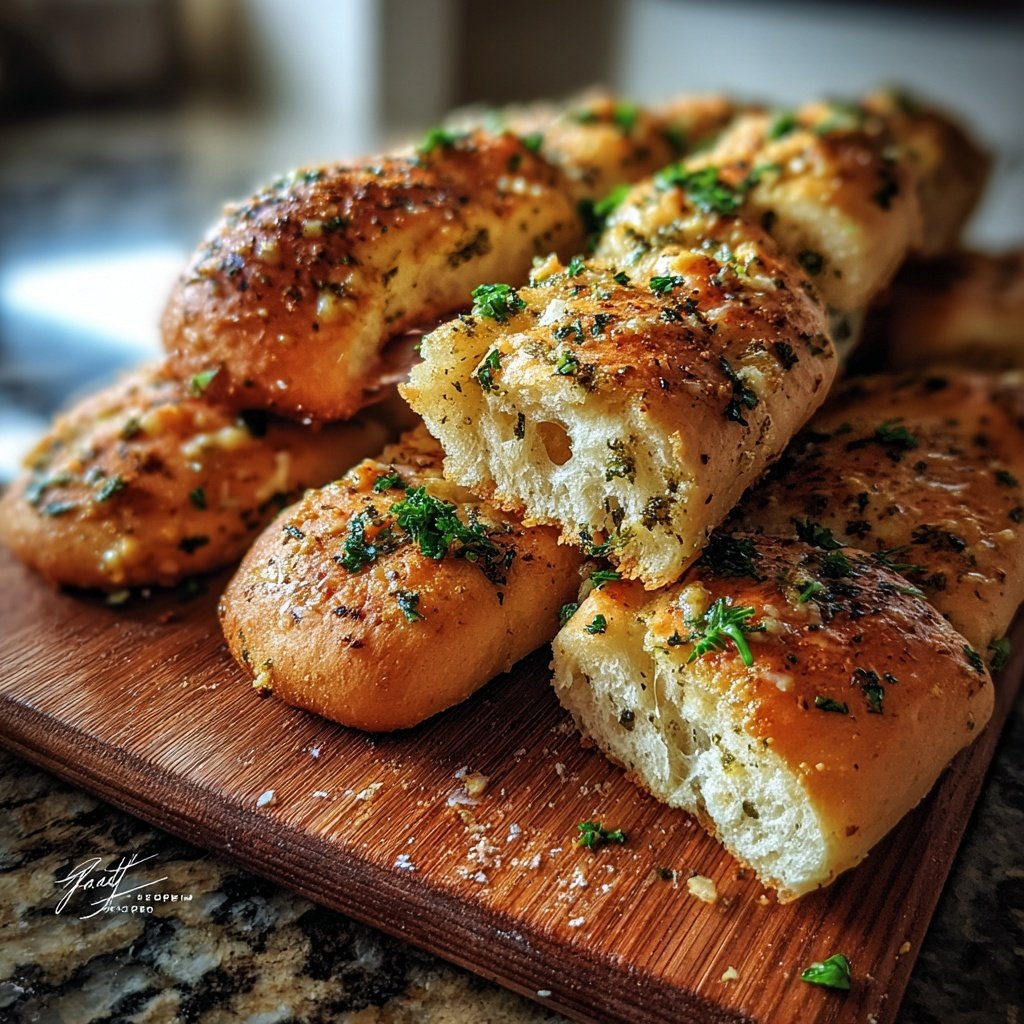
I absolutely love making Garlic Herb Breadsticks at home, and the process is surprisingly easy! The aroma of fresh garlic combined with Italian herbs fills the kitchen and sets the mood for a delicious meal. These breadsticks are perfect for accompanying pasta dishes or serving as a snack on their own. Each crispy bite brings warmth and flavor, and I especially enjoy brushing them with a fragrant herb-infused butter before baking. Trust me, once you try making these, you'll never want to reach for store-bought again!
When I first attempted to make Garlic Herb Breadsticks, I was amazed at how simple yet rewarding the process was. The key is in the dough, which requires just the right amount of kneading to achieve that perfect chewy texture. I also discovered that letting the dough rise properly is crucial for achieving the fluffiness that pairs beautifully with the crispiness of the baked exterior.
One detail that truly elevates these breadsticks is the herb-infused butter. I mix melted butter with minced garlic and finely chopped herbs like rosemary and thyme for a flavor explosion. Brushing this mixture onto the breadsticks before baking results in a golden-brown finish with an irresistible aroma that fills the house.
Why You'll Love These Garlic Herb Breadsticks
- Perfectly crispy on the outside and soft on the inside
- Infused with aromatic garlic and fresh herbs
- Great as a side for any meal or as a standalone snack
Achieving the Perfect Texture
The contrast between the crispy outer layer and the soft inner texture of these Garlic Herb Breadsticks is purely delightful. When kneading the dough, aim for a smooth consistency that is slightly tacky but not overly sticky. If you find your dough too sticky, add a dusting of flour, but be cautious not to add too much, as it could lead to denser breadsticks. The fermentation process during the rising phase is crucial for creating that light texture, so ensure you allow the dough to rest adequately in a warm area.
During the baking phase, keep an eye on the color of your breadsticks. They should start to take on a golden hue around the edges, which typically indicates they are close to being fully cooked. If you want to assure perfect doneness without overbaking, the internal temperature of the breadsticks should reach around 190°F (88°C). A beautifully baked breadstick will also sound hollow when tapped—this is a great trick to check if they are done!
Making and Storing Herb Butter
The herb butter is what truly elevates the flavor of these breadsticks, making each bite an explosion of garlic and fresh herbs. To achieve the best flavor infusion, let your melted butter cool slightly before adding minced garlic; this prevents the garlic from cooking too quickly, which can lead to a bitter taste. If fresh herbs aren't available, you can substitute with dried herbs, but use about one-third of the amount, as dried herbs are more concentrated.
If you find that you have leftover herb butter, don’t toss it! It can be refrigerated for up to a week or frozen in an ice cube tray for future use. This is a fantastic way to add flavor to other dishes like roasted vegetables or grilled meats. Just be sure to thaw and reheat the butter gently, as high heat can cause it to separate, losing its creamy texture.
Serving Suggestions and Variations
Garlic Herb Breadsticks can be enjoyed in various ways. While they are superb alongside a hearty pasta dish, consider serving them with marinara sauce for dipping or as an accompaniment to creamy soups. They also work well in a basket at gatherings or potlucks, inviting friends and family to indulge in their deliciousness.
For a twist on the traditional recipe, try adding grated cheese to the dough or topping the breadsticks with shredded mozzarella or Parmesan before baking. You could also experiment with other herbs such as oregano or basil for different flavor profiles. If you're craving a bit of heat, a pinch of red pepper flakes in the herb butter or directly in the dough can add an enjoyable kick!
Ingredients
Gather the following ingredients to make your Garlic Herb Breadsticks:
Breadstick Dough
- 2 cups all-purpose flour
- 1 packet (2 1/4 tsp) active dry yeast
- 1 tsp sugar
- 3/4 tsp salt
- 3/4 cup warm water
- 1 tbsp olive oil
Herb Butter
- 3 tbsp unsalted butter, melted
- 2 cloves garlic, minced
- 1 tbsp fresh rosemary, chopped
- 1 tbsp fresh thyme, chopped
- 1/2 tsp sea salt
Make sure to have all these ingredients ready to go before starting your preparation.
Instructions
Follow these steps to create delicious Garlic Herb Breadsticks:
Prepare the Dough
In a large mixing bowl, combine warm water, sugar, and yeast. Let it sit for about 5 minutes until frothy. Gradually add in the flour, salt, and olive oil, mixing until a dough forms. Knead on a floured surface for about 5 minutes.
Let it Rise
Place the dough in a greased bowl, cover with a damp cloth, and let it rise in a warm place for 15-20 minutes until doubled in size.
Shape the Breadsticks
Preheat your oven to 400°F (200°C). Once the dough has risen, punch it down and divide it into 12 equal pieces. Roll each piece into a stick shape and place on a greased baking sheet.
Prepare the Herb Butter
In a bowl, mix melted butter with minced garlic, chopped herbs, and sea salt. Brush the mixture generously over the shaped breadsticks.
Bake
Bake for 12-15 minutes until golden brown. Remove from the oven and brush with any leftover herb butter for extra flavor.
Let the breadsticks cool for a few minutes before serving warm.
Pro Tips
- For extra flavor, try adding grated Parmesan cheese to the herb butter mixture. You can also experiment with different herbs based on your preference!
Troubleshooting Common Issues
If your dough doesn't rise as expected, check that your yeast is active. You can do this by adding it to warm water mixed with sugar; it should become foamy after a few minutes. If it doesn’t, that may indicate stale yeast. Also, always ensure your development environment is warm enough; a cold kitchen can inhibit proper rising.
Another potential issue is overbaking the breadsticks. Adjusting baking times based on your oven’s heat distribution is key. If you notice that the bottom of your breadsticks is browning too quickly, place your baking sheet on a lower rack for the last few minutes of baking. This will help ensure an evenly baked stick without risking a burnt underside.
Make-Ahead and Freezing Tips
You can prepare the dough a day in advance. After the dough has risen, punch it down, wrap it tightly in plastic wrap, and refrigerate. When you're ready to bake, allow the dough to come to room temperature and rise again before shaping. This can actually enhance the flavor as the dough ferments further in the fridge.
For those who wish to freeze the breadsticks, do so after baking. Allow them to cool completely, then wrap each stick in plastic wrap followed by aluminum foil. They can be frozen for up to three months. When you're ready to enjoy them, reheat from frozen in a 375°F (190°C) oven for about 10-15 minutes until warmed through and crispy again.
Questions About Recipes
→ Can I use instant yeast instead of active dry yeast?
Yes, you can use instant yeast without proofing it in water. Just add it directly to the flour mixture.
→ How do I store leftover breadsticks?
Store them in an airtight container at room temperature for up to 2 days, or freeze them for longer storage.
→ Can I make the dough ahead of time?
Absolutely! You can prepare the dough and keep it in the refrigerator overnight. Just let it come to room temperature before shaping.
→ What can I serve these breadsticks with?
These breadsticks pair wonderfully with marinara sauce, soups, salads, or even as an accompaniment to your favorite pasta dishes.
Garlic Herb Breadsticks
Created by: Freya Cooper
Recipe Type: Cakes & Confections
Skill Level: Beginner
Final Quantity: 12 breadsticks
What You'll Need
Breadstick Dough
- 2 cups all-purpose flour
- 1 packet (2 1/4 tsp) active dry yeast
- 1 tsp sugar
- 3/4 tsp salt
- 3/4 cup warm water
- 1 tbsp olive oil
Herb Butter
- 3 tbsp unsalted butter, melted
- 2 cloves garlic, minced
- 1 tbsp fresh rosemary, chopped
- 1 tbsp fresh thyme, chopped
- 1/2 tsp sea salt
How-To Steps
In a large mixing bowl, combine warm water, sugar, and yeast. Let it sit for about 5 minutes until frothy. Gradually add in the flour, salt, and olive oil, mixing until a dough forms. Knead on a floured surface for about 5 minutes.
Place the dough in a greased bowl, cover with a damp cloth, and let it rise in a warm place for 15-20 minutes until doubled in size.
Preheat your oven to 400°F (200°C). Once the dough has risen, punch it down and divide it into 12 equal pieces. Roll each piece into a stick shape and place on a greased baking sheet.
In a bowl, mix melted butter with minced garlic, chopped herbs, and sea salt. Brush the mixture generously over the shaped breadsticks.
Bake for 12-15 minutes until golden brown. Remove from the oven and brush with any leftover herb butter for extra flavor.
Extra Tips
- For extra flavor, try adding grated Parmesan cheese to the herb butter mixture. You can also experiment with different herbs based on your preference!
Nutritional Breakdown (Per Serving)
- Calories: 150 kcal
- Total Fat: 9g
- Saturated Fat: 5g
- Cholesterol: 15mg
- Sodium: 120mg
- Total Carbohydrates: 17g
- Dietary Fiber: 1g
- Sugars: 1g
- Protein: 3g