Homemade Peanut Butter Cups Mini Bites
Highlighted under: Cakes & Confections
I can't resist the creamy, sweet, and salty goodness of these Homemade Peanut Butter Cups Mini Bites. Making them from scratch has not only been a fun kitchen project, but it also means I can adjust the sweetness and quality of the ingredients. Each bite is a burst of flavor, combining rich chocolate with a delicious silky peanut butter center. Plus, they're quick to whip up and perfect for satisfying those sweet cravings anytime. Trust me, once you try these, you won't want to go back to store-bought versions!
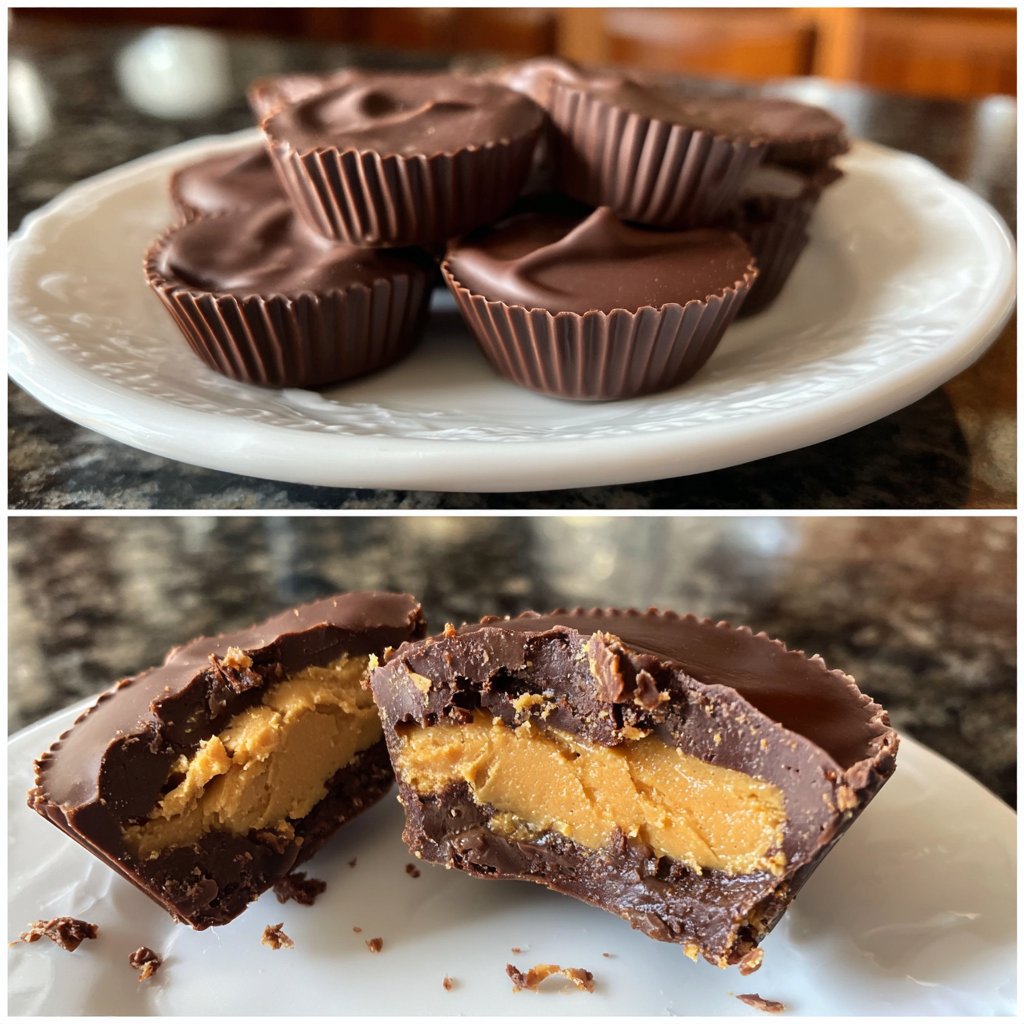
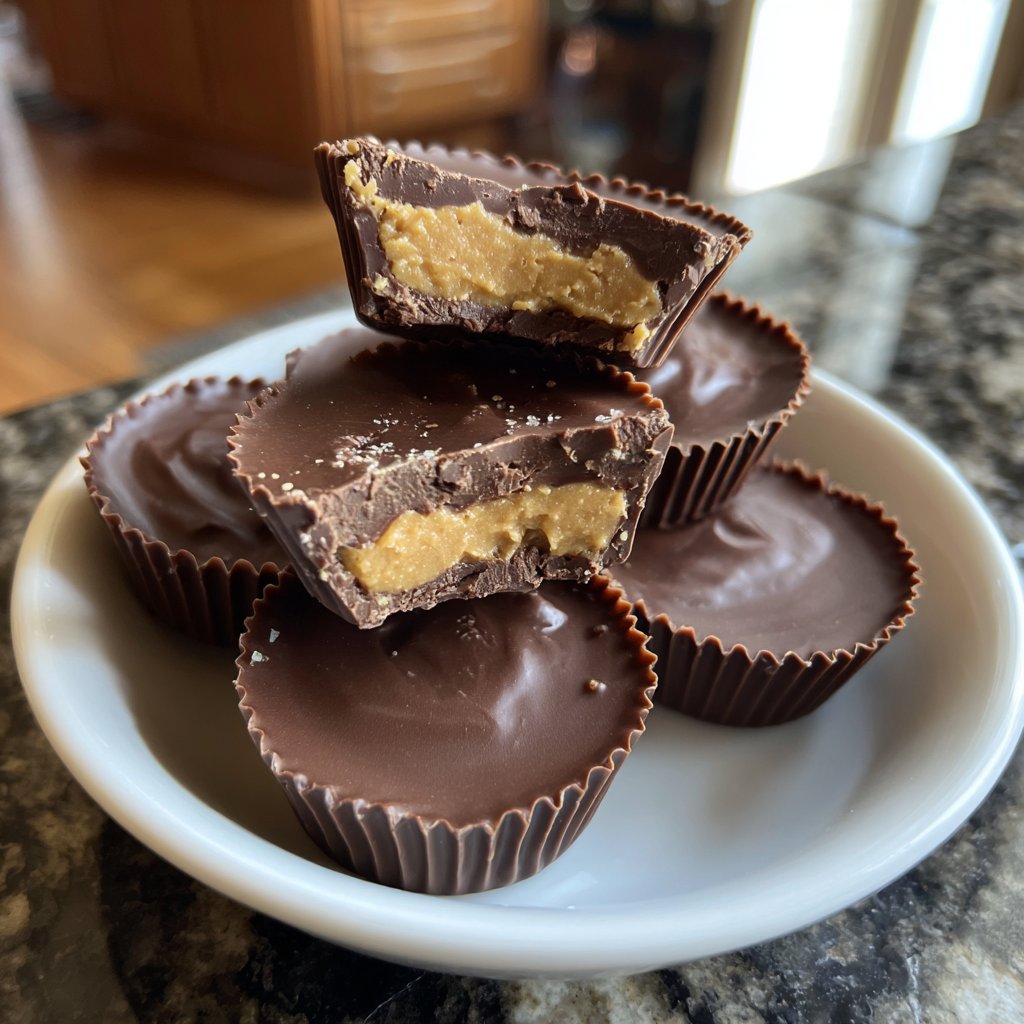
I first tried making these mini peanut butter cups at home during a family gathering, and they were a hit! I love how simple the ingredients are – just chocolate and peanut butter – yet the flavor is remarkably satisfying. Melting the chocolate over low heat ensured it stayed smooth and glossy, which made coating the cups easy and fun.
One tip that really helped was refrigerating the peanut butter mixture for a bit before scooping it into the chocolate. This ensures that each cup holds its shape and has a lovely, creamy center. Plus, it’s a delightful surprise to share with friends!
Why You'll Love This Recipe
- Rich chocolate flavor paired with creamy peanut butter
- Perfectly sized for a sweet snack on the go
- Easily customizable with your favorite nut butters or toppings
Understanding the Ingredients
The primary ingredients in these Homemade Peanut Butter Cups Mini Bites are semi-sweet chocolate chips and creamy peanut butter, both of which play a vital role in the final flavor and texture. The chocolate provides a rich, sweet contrast to the salty peanut butter, creating a well-balanced treat. Opting for high-quality chocolate chips, such as Ghirardelli or Guittard, ensures that you'll have a glossy finish and a depth of flavor that makes each bite truly decadent.
Creamy peanut butter is essential in this recipe, adding both flavor and a smooth texture that pairs perfectly with the chocolate. If you are looking for a healthier alternative, you can use natural peanut butter, but keep in mind that it may not be as sweet. Adjust the powdered sugar based on your taste preference to achieve the right level of sweetness to complement the chocolate.
Perfecting the Technique
Melting the chocolate is a crucial step in this recipe. I recommend using a microwave since it allows for easy, controlled melting. Heating in 30-second intervals helps prevent burning and ensures that the chocolate becomes silky smooth. Stirring between intervals is key — you're looking for a glossy texture without any lumps. If you accidentally overheat it, try adding a teaspoon of vegetable oil to bring it back to life.
Coating the mini cupcake liners is where you can elevate your presentation. Make sure you cover the sides evenly; use just enough melted chocolate to create a sturdy shell without it being too thick. This method not only adds to the visual appeal but also helps prevent a break when you peel the liners away. After the first chocolate layer sets, feel free to experiment with adding crushed nuts or sea salt on top of the chocolate layer for added texture.
Ingredients
Gather these simple ingredients to get started:
Ingredients
- 1 cup semi-sweet chocolate chips
- 1/2 cup creamy peanut butter
- 2 tablespoons powdered sugar
- 1/2 teaspoon vanilla extract
- Mini cupcake liners
Once you have everything, you’ll be ready to create these delectable bites!
Instructions
Follow these easy steps to make your mini bites:
Melt the Chocolate
In a microwave-safe bowl, melt half of the chocolate chips in 30-second intervals, stirring in between until smooth.
Prepare the Cupcake Liners
Place mini cupcake liners into a mini muffin tin for easy handling.
Coat the Liners
Using a spoon, add a small amount of melted chocolate to each liner, tilting to coat the sides. Place in the refrigerator for 10 minutes to set.
Mix Peanut Butter Filling
In a small bowl, mix together the peanut butter, powdered sugar, and vanilla extract until smooth and creamy.
Fill the Cups
Remove the chocolate-coated liners from the fridge, and add a dollop of the peanut butter mixture into each cup, pressing down gently.
Top with Chocolate
Melt the remaining chocolate chips and pour a layer over the peanut butter filling to seal it. Return to the refrigerator until firm.
Enjoy!
Once set, peel off the liners and enjoy your delicious homemade peanut butter cups mini bites!
Enjoy your sweet creations and impress your friends!
Pro Tips
- Feel free to experiment by adding a sprinkle of sea salt on top or using dark chocolate for a richer flavor.
Storage and Make-Ahead Tips
These mini peanut butter cups can be made ahead and stored for a quick treat whenever a sweet craving strikes. Once they are set and removed from the liners, place them in an airtight container. They can last up to two weeks in the fridge or up to three months in the freezer. If freezing, use parchment paper between layers to avoid sticking. Just thaw them in the fridge for a few hours before enjoying.
To enhance freshness, consider storing them with a piece of bread in the container. It helps to maintain moisture levels, preventing the chocolate from becoming too hard or the peanut butter from drying out. When serving, you can also let them sit at room temperature for a few minutes to soften the chocolate, making them even more delightful!
Serving Suggestions and Variations
These homemade peanut butter cups are versatile and can be tailored to fit various occasions. For a fun twist, you could add toppings like crushed pretzels, sea salt, or colorful sprinkles before the final chocolate layer sets, creating a delightful flavor contrast and visual appeal. You can also experiment with different types of nut butters such as almond or cashew for a unique taste.
If you're looking to impress during the holidays or special gatherings, you could transform these bites into themed treats by using white chocolate and coloring it for festive occasions. Think red and green for Christmas or pastel shades for spring celebrations. Present them beautifully on a platter, and watch them disappear in no time!
Questions About Recipes
→ Can I use almond butter instead of peanut butter?
Yes, almond butter works great and can be used in equal amounts for a different flavor.
→ How long will these mini bites last?
They can be stored in an airtight container in the refrigerator for up to 2 weeks.
→ Can I freeze these mini bites?
Absolutely! They freeze well and can be enjoyed straight from the freezer for a cool treat.
→ What if I don't have mini cupcake liners?
You can use a silicone mold or simply pour the mixture into a lined tray and cut them into squares once set.
Homemade Peanut Butter Cups Mini Bites
Created by: Freya Cooper
Recipe Type: Cakes & Confections
Skill Level: Easy
Final Quantity: 12 mini bites
What You'll Need
Ingredients
- 1 cup semi-sweet chocolate chips
- 1/2 cup creamy peanut butter
- 2 tablespoons powdered sugar
- 1/2 teaspoon vanilla extract
- Mini cupcake liners
How-To Steps
In a microwave-safe bowl, melt half of the chocolate chips in 30-second intervals, stirring in between until smooth.
Place mini cupcake liners into a mini muffin tin for easy handling.
Using a spoon, add a small amount of melted chocolate to each liner, tilting to coat the sides. Place in the refrigerator for 10 minutes to set.
In a small bowl, mix together the peanut butter, powdered sugar, and vanilla extract until smooth and creamy.
Remove the chocolate-coated liners from the fridge, and add a dollop of the peanut butter mixture into each cup, pressing down gently.
Melt the remaining chocolate chips and pour a layer over the peanut butter filling to seal it. Return to the refrigerator until firm.
Once set, peel off the liners and enjoy your delicious homemade peanut butter cups mini bites!
Extra Tips
- Feel free to experiment by adding a sprinkle of sea salt on top or using dark chocolate for a richer flavor.
Nutritional Breakdown (Per Serving)
- Calories: 145 kcal
- Total Fat: 12g
- Saturated Fat: 4g
- Cholesterol: 0mg
- Sodium: 50mg
- Total Carbohydrates: 11g
- Dietary Fiber: 1g
- Sugars: 8g
- Protein: 3g